Welcome to your new life! Arriving in Canada as an immigrant is an incredibly exciting milestone, but the first few days are often a whirlwind of paperwork, structural adjustments, and essential administrative setups. To help you navigate this transition seamlessly, this comprehensive guide outlines exactly what you need to do immediately after landing, complete with real-world, hard-earned insights from an expat who successfully navigated the entire process.
Your official journey begins the moment you touch down. Preparing your paperwork in advance is the key to minimizing stress at your first Canadian point of contact.
Present your documents: You must present your passport alongside your Confirmation of Permanent Residence (COPR), or your official study or work permit approval letter to the Canada Border Services Agency (CBSA) officer.
Declare your belongings: Submit your customs declaration form. If you have personal items arriving at a later date, ensure you present a detailed list of "Goods to Follow" to avoid paying unnecessary duties later.
Provide a mailing address: Permanent Residents must give a secure Canadian address where the government can mail their physical Permanent Resident card (PR Card).
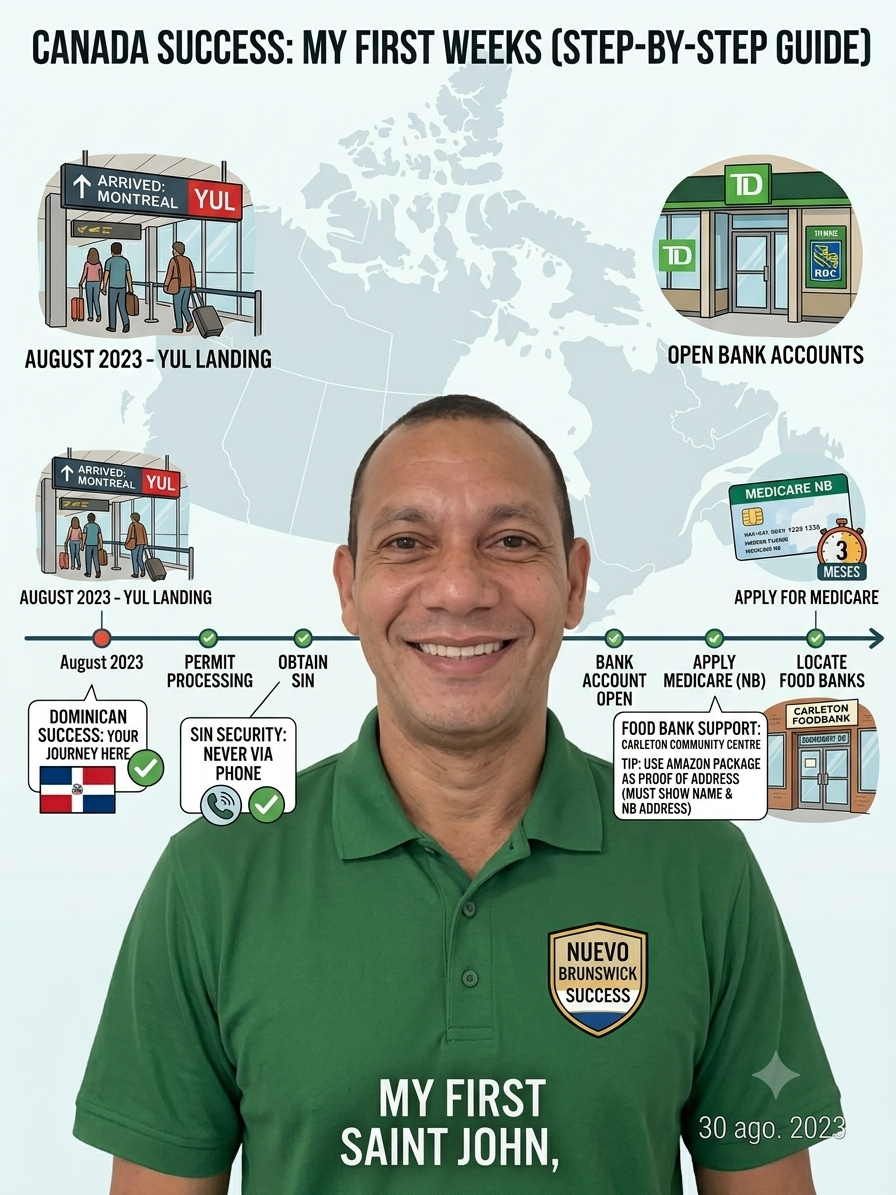
Real Newcomer Experience: Landing at Montreal-Trudeau (YUL) *"When my journey began from the Dominican Republic, Montreal International Airport was my first stop in Canada. This exceptionally busy, high-traffic hub requires patience due to long lines at immigration. Arriving as an international student meant waiting quite a bit to receive both my physical study permit and a part-time work permit.
Fortunately, the CBSA officers can speak either English or French. During my process, I noticed they make a high effort to understand newcomers, often using multiple languages to actively figure out your mother tongue and ease communication. Although they usually initiate conversations in French, switching to English happens immediately if you do not speak French. To make the entire process smoother, I highly recommend using the ArriveCAN app, which is incredibly simple and easy to navigate."*
Step 2: Obtain Your Permits and Social Insurance Number (SIN)
Your physical work or study permit is your foundational legal identity document while living in Canada. You must safeguard these documents carefully, as they open the doors to all subsequent civil procedures.
Once your permits are issued, your immediate next task is applying for a Social Insurance Number (SIN). The SIN is a confidential 9-digit number legally required to work, open bank accounts, and participate in tax programs.
Where to apply: Visit a physical Service Canada office or provincial service hub (such as Service New Brunswick) to have your SIN generated and printed on the spot.
Online option: You can apply via the online government portal, though processing takes several business days. In-person visits are highly recommended.
⚠️ Critical Security Warning Regarding Your SIN Treat your SIN exactly like a highly confidential national identity number. Store it securely and never share it over the phone or via text/email. Legitimate entities will only request it during formal, in-person verification. Sharing this number carelessly exposes you to identity theft and severe financial scams. Only share your SIN with verified employers, financial institutions, and the Canada Revenue Agency (CRA).
Step 3: Open a Canadian Bank Account and Establish Credit
Securing your finances and establishing a local credit history are essential components of arriving in Canada as an immigrant. Without a Canadian credit score, renting an apartment, signing a phone contract, or financing a vehicle down the road becomes significantly harder.
Choose a Newcomer Package: Major Canadian banks (including RBC, TD, BMO, Scotiabank, and CIBC) offer specialized newcomer packages that include free checking and savings accounts for the first 12 months.
Bring the required documentation: Once you have your SIN and either your work or study permit, you are legally equipped to open an account. Bring your passport, permit, SIN, and temporary address proof to a local branch.
Apply for a credit card immediately: Utilize your bank's newcomer program to obtain a basic credit card. Use it responsibly for everyday purchases and pay the balance in full each month to build an excellent credit rating.
Step 4: Secure Provincial Health Insurance (Medicare)
While healthcare in Canada is publicly funded, it is administered locally by individual provinces and territories. Ensuring you are covered should be done as soon as you have established a fixed residential address.
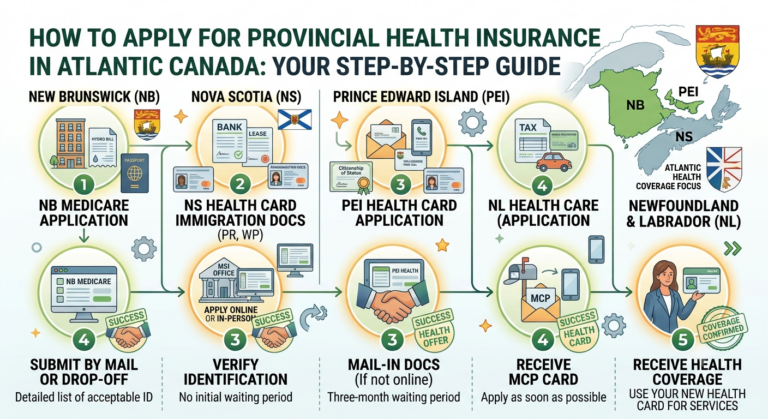
Register immediately: Apply for your provincial health plan (such as Medicare in New Brunswick) immediately upon moving into your housing.
Be prepared for processing delays: In New Brunswick, it can take up to three months for your physical card to arrive. Because you are not fully covered until the card is active, purchasing private visitor insurance for this bridging period is highly recommended to protect your family.
Step 5: Master the Housing Search (The Airbnb Strategy)
Finding long-term housing is a delicate process when arriving in Canada as an immigrant, especially since most landlords require basic Canadian credentials like your bank account, local phone number, and a local address before approving a lease.
The Smart Strategy: Start contacting landlords online while you are still in your home country to scout the market. However, do not commit to or pay for a long-term rental sight unseen. Instead, book an Airbnb for your first few days in Canada. Use this temporary cushion to visit the houses, rooms, or apartments in person.
Maximize your physical viewings: Double-check that the apartment does not require repairs and verify the landlord's background. Note that while some landlords require local references, not all do. Don’t waste time checking dwellings you don't qualify for; without a car, commuting to viewings will quickly drain your limited funds.
Keep Airbnb temporary: Treat Airbnb strictly as a launchpad. Avoid staying in a shared temporary residence for more than a month, as living long-term with a revolving door of different people in the same house can lead to unnecessary complications. Directories like atlantino.ca can be highly effective for finding locally targeted, trusted community housing options.
Step 6: Overcome the Atlantic Canada Transportation Challenge
If you are settling in the Maritimes (New Brunswick, Nova Scotia, Prince Edward Island), transportation is a top priority that you must take seriously. Unlike large metropolitan areas, public transit routes here are limited. Even where transit exists, schedules usually run 30 minutes apart and can easily be disrupted by traffic, strikes, or holidays, making it unreliable for commuting to work on time.
The Reality of the Local Job Market
Atlantic Canadian employers strongly prefer employees with their own personal transportation. To secure a good job, you almost always need your own vehicle; without one, finding employment becomes exceptionally difficult.
Navigating the Canadian Driver's License Process
Buying a vehicle is relatively easy if you have the funds, but driving legally and affordably requires a provincial license. While you can drive using your home country's license initially, your tourist driving status expires within 3 to 6 months. Furthermore, immigrant car insurance with a foreign license is incredibly expensive and strictly temporary.
To get your Canadian driver's license, you must transition through the provincial system (e.g., Service New Brunswick):
Phase 1: The Written Theory Test
First, book an appointment at your local service center. Remember to bring your foreign driver's license, work or study permit, SIN, and physical housing lease. After filling out the application and paying the fee, you must study the provincial driving guide.
To prepare effectively, you can utilize excellent online resources like:
FREE NB Driver’s Test Practice
NB Drivers Practice Test for Road
Rules of the Exam Environment: The provincial government allows you to take the written test online on a fixed date. However, regulations require you to sit in a quiet room completely free of distractions. No one else can enter the workspace, and taking phone calls or chatting is strictly prohibited. This exam lasts roughly 1 hour and becomes very easy to pass if you dedicated time to studying the guide.
What is the Apprentice Card? Passing the written test grants you an apprentice card immediately. This document allows you to drive legally on Canadian roads, but with two strict conditions: you can only drive during daylight hours, and a fully licensed driver must sit in the passenger seat next to you at all times.
Phase 2: The Road Test (Practical Exam)
Once you gain enough confidence behind the wheel, schedule an appointment for your route test. Keep in mind that waiting times depend heavily on the volume of current applications in your local area.
An evaluator will sit in the passenger seat to guide your directions and take notes. Throughout the route, they will score your driving habits, parking ability, and respect for traffic signals through the town or city.
Once you return to the service office, simply park the car and turn off the engine. The evaluator will instantly review your score and tell you if you passed or failed.
What Happens If You Pass? Success means going straight inside the office to take your new photo. The staff will hand you your official Canadian driver's license on the spot. Note that the office will permanently keep your foreign driver's license, as you are legally only allowed to hold one valid license in Canada.
What Happens If You Fail? In case you do not pass, booking another appointment to retake the road test is required. The provincial system gives you a maximum of 3 chances to clear the practical exam. Unfortunately, if you do not pass by the third attempt, you must start the entire process over from the absolute beginning, including rewriting the theory test.
Step 7: Leverage Local Support (Food Banks & Budgeting)
During your first two to three weeks, you likely won't be working yet. Converting your home currency to spend on standard living costs can rapidly deplete your limited savings. To keep your family secure and stretch your initial budget, do not hesitate to utilize local community resources.
Organizations like the Carleton Community Centre in Saint John, NB, run highly supportive food banks. They offer free food baskets filled with pantry staples (rice, beans, bread, canned items) and fresh vegetables. Utilizing these services saves you hundreds of dollars a month, allowing you to bypass full grocery bills and focus your cash strictly on items like fresh meat, drinking water, or utility setups.
How to Qualify for Food Bank Assistance: To access supplies, most community food banks require you to present your provincial health card (Medicare) alongside solid proof of your local physical address. You can easily prove your address by showing a utility bill or a package delivery label (such as an Amazon delivery box showing your name, street address, and postal code).
If you found this guide helpful, check out our other community resources and housing directories over at atlantino.ca to make your transition into Canadian life smooth and successful!